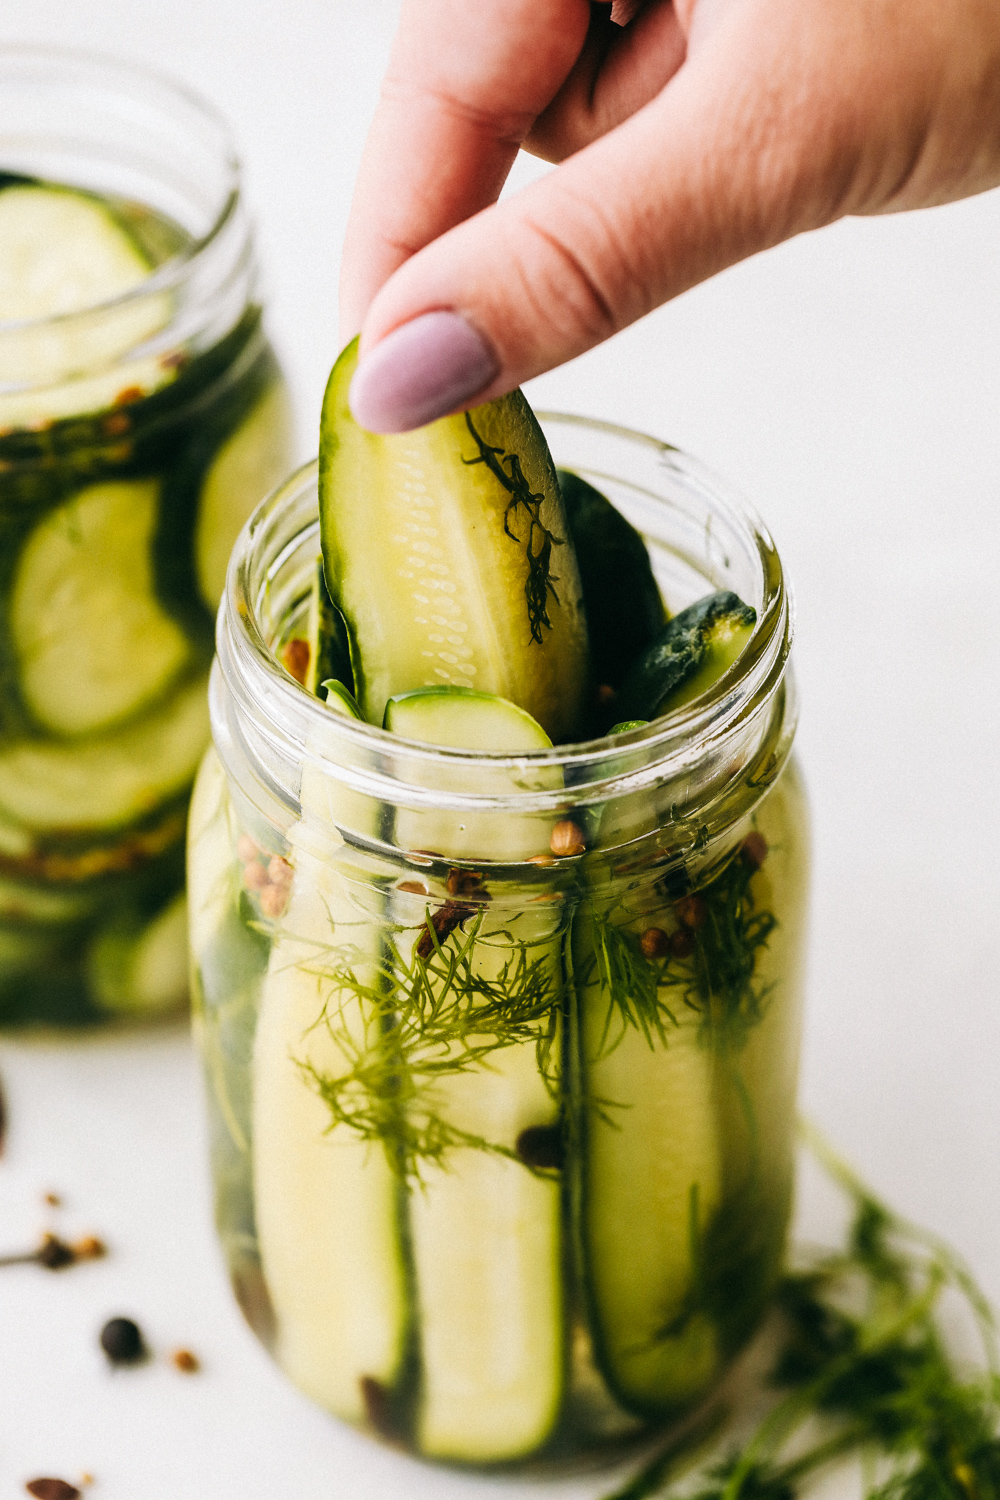
If you’re dreaming of calmer evenings and meals everyone actually enjoys, this weekly meal plan is for you. Print the shopping list, stock up, and get ready for comforting, easy recipes that make dinnertime feel good again.
What’s for Dinner This Week?
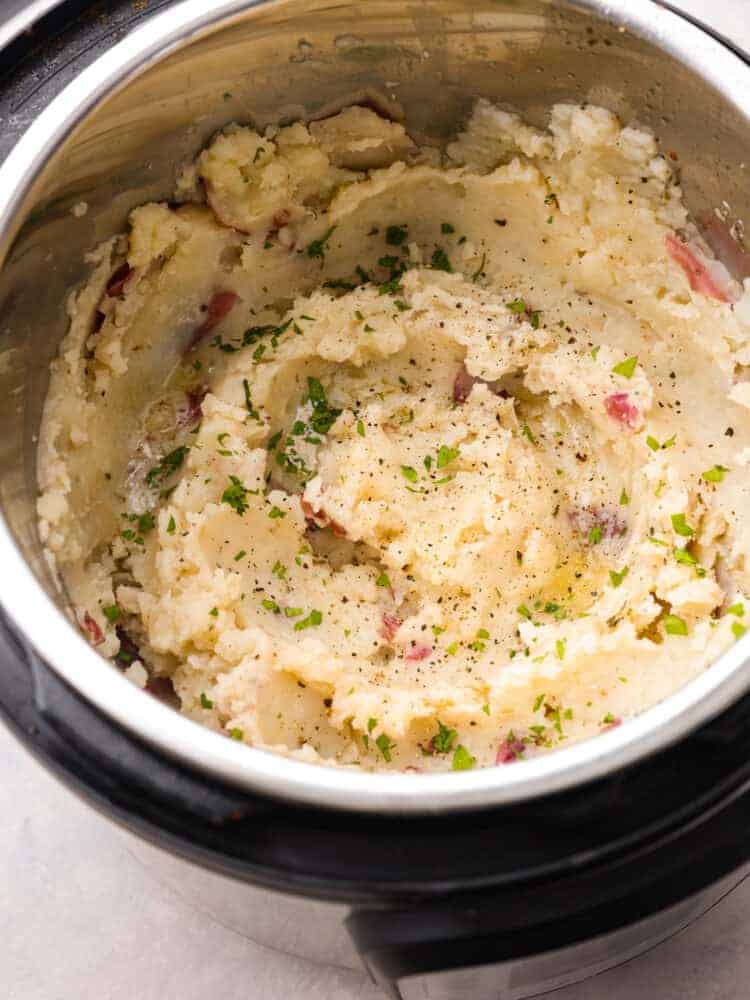
This week, we’re serving up some cozy chicken recipes, seasoned shrimp, and cheesy baked pasta. They will all hit the spot and can be customized with simple sides like my garlic mashed potatoes, rice pilaf, and my favorite caesar salad! In the mood for something different? Check out my other meal plans here!
This free weekly menu plan is just what you need to get your week started. It provides 5 meals that will feed 4-6 (depending on whether you are feeding adults or kids) AND it includes a shopping list! With fresh new ideas and easy-to-make recipes, this weekly menu plan will be a lifesaver
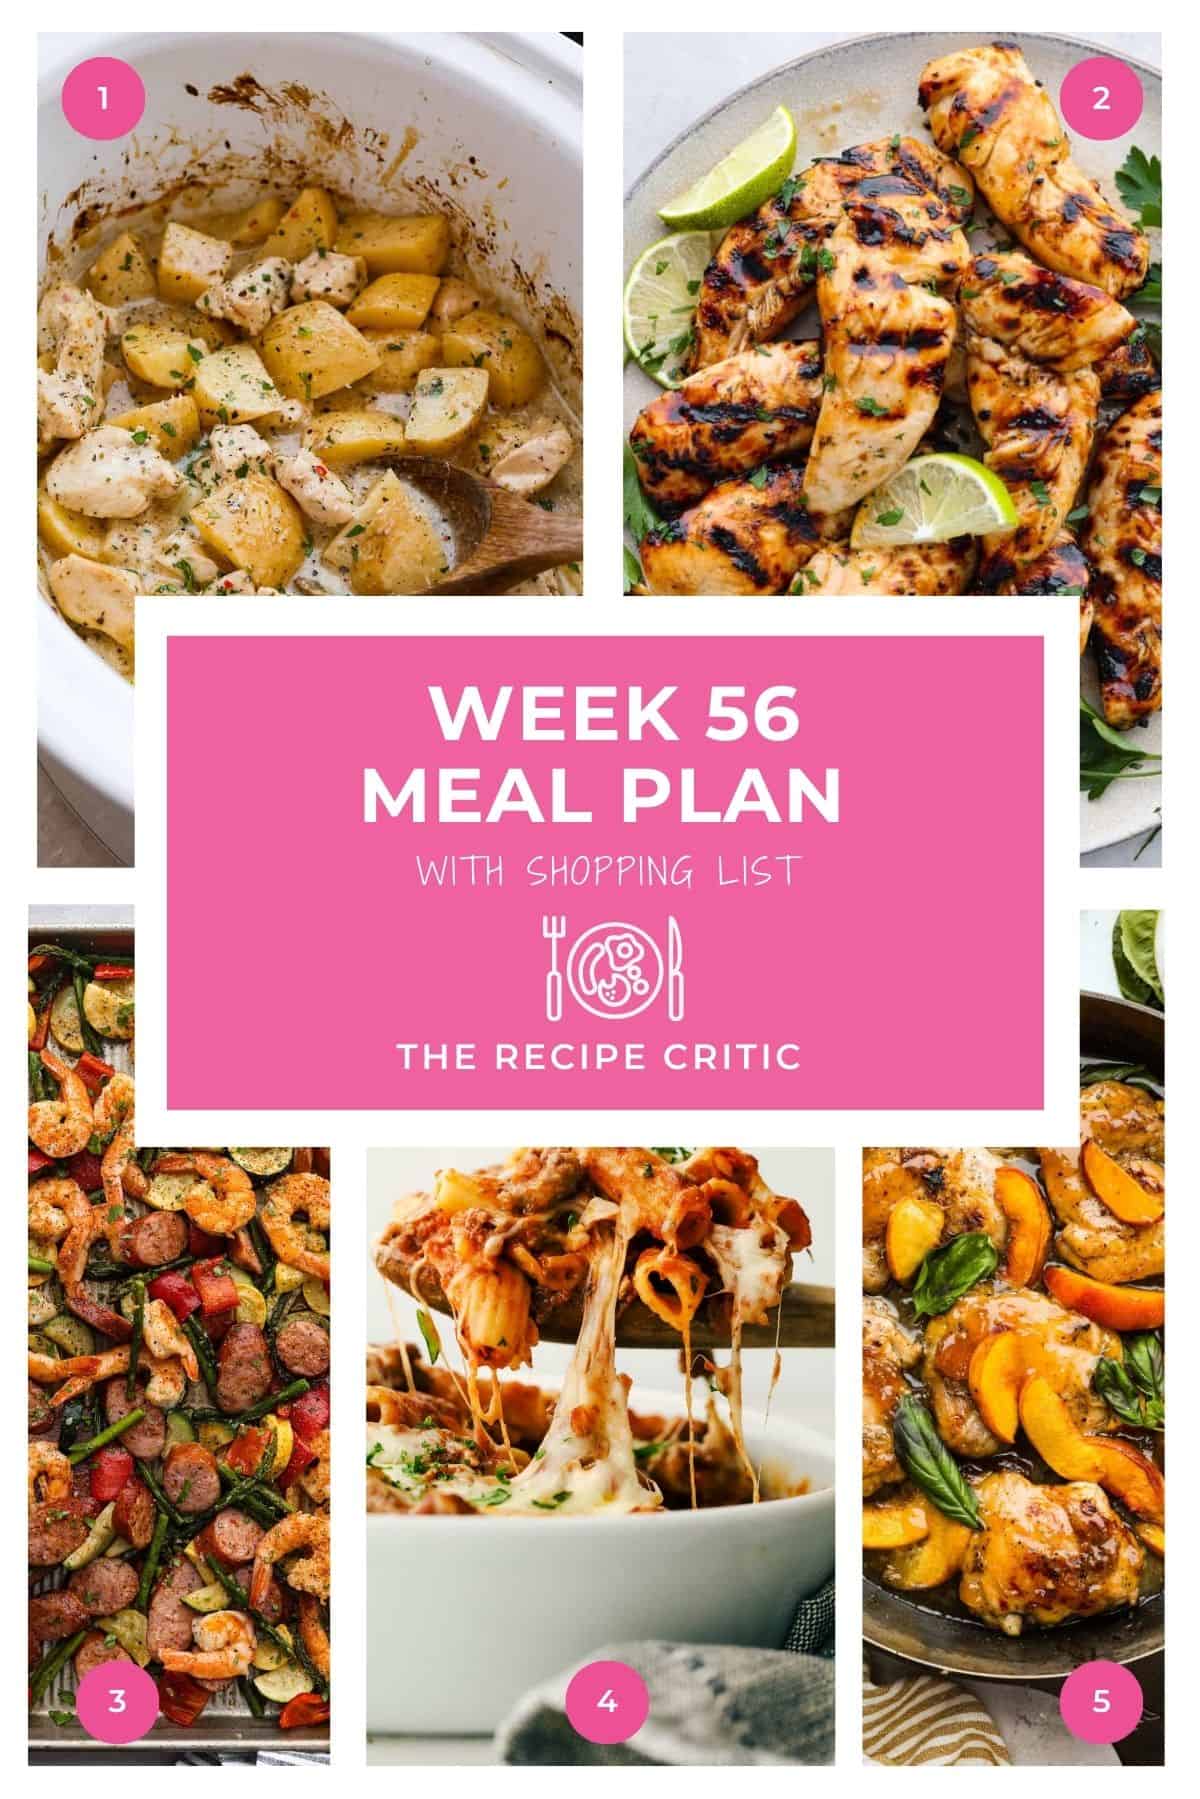
Slow Cooker Parmesan Garlic Chicken and Potatoes
4 from 1 vote
This Slow Cooker Parmesan Garlic Chicken and Potatoes has juicy chicken, tender potatoes, and a rich, creamy parmesan garlic sauce.
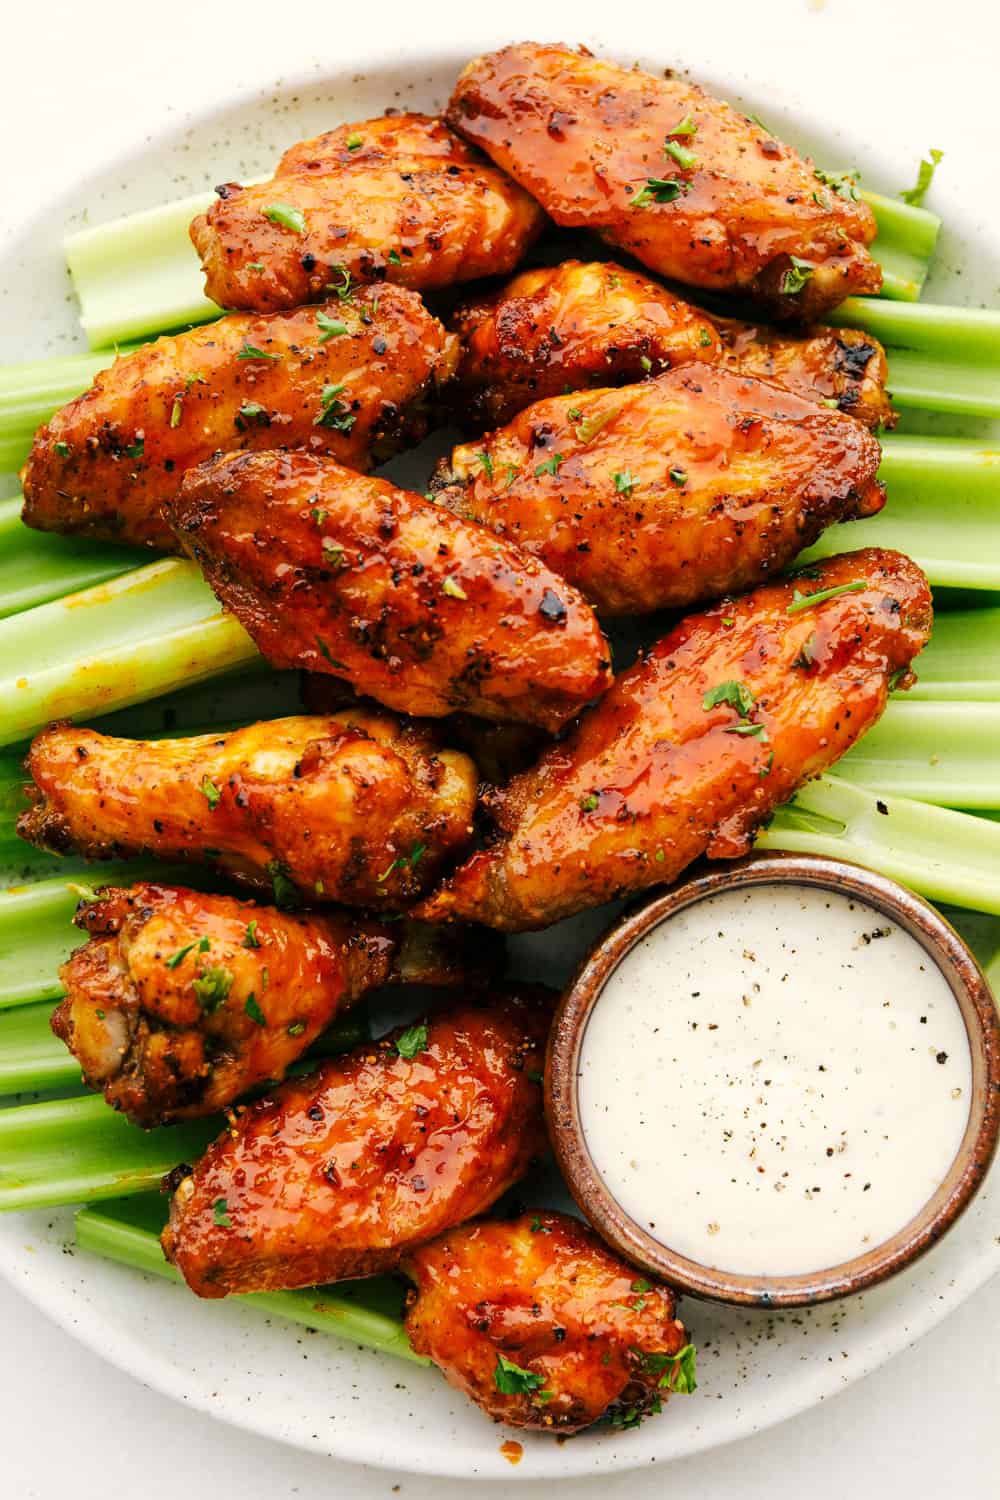
Juicy and flavorful, these 4-ingredient grilled chicken tenders are going to be your favorite thing to cook up this summer! They have a delicious honey lime glaze you'll be licking off your fingers!
Cajun shrimp and sausage vegetable sheet pan is so incredibly easy that it makes a perfect weeknight meal! It's bursting with amazing Cajun flavor! This is a healthy and delicious one-pan dinner full of shrimp, sausage, and veggies.
If you haven’t tried planning your meals ahead of time, this is going to be a game-changer for you! Here’s why I swear by weekly meal planning:
Less Stress, More Calm: No more last-minute “what’s for dinner?” panic. Meal planning gives you a game plan so evenings run smoother.
Save Serious Money: A thoughtful plan means fewer impulse buys, smarter bulk shopping, and leftovers that actually get used. It all adds up to real savings.
Healthier Choices: Meal planning maps out your week and keeps the right ingredients on hand, making it easy to cook at home instead of grabbing takeout.
Time Back in Your Day: Meal planning keeps you from wasting time staring into the fridge or running to the store five times a week.
Happier Family Dinners: Having a plan means meals everyone actually looks forward to, and fewer dinnertime battles.
I only meal plan Monday-Friday because we sometimes have plans over the weekend, or I have leftovers that we can have to finish off the week! If you do have leftovers, make sure to store them properly in an airtight container in your fridge.
from The Recipe Critic https://ift.tt/rQIgANX
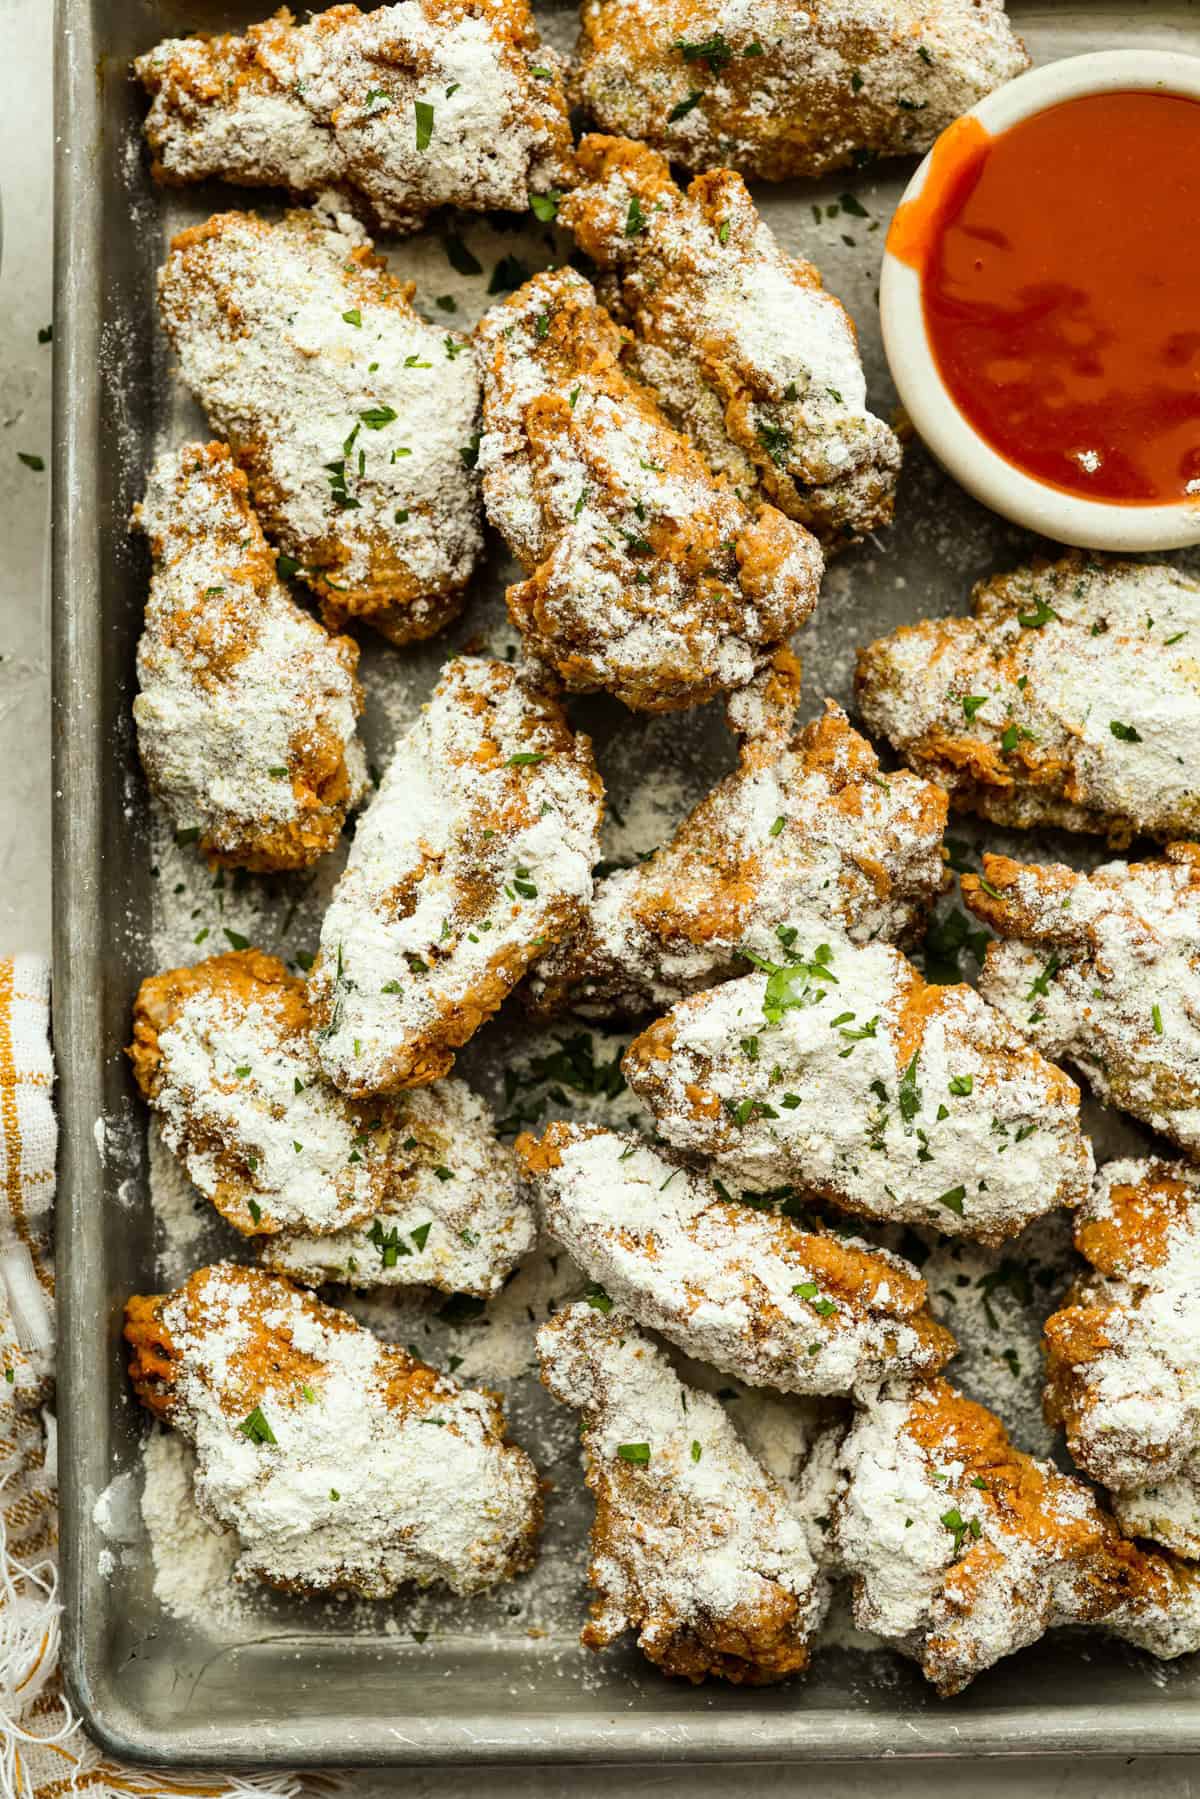
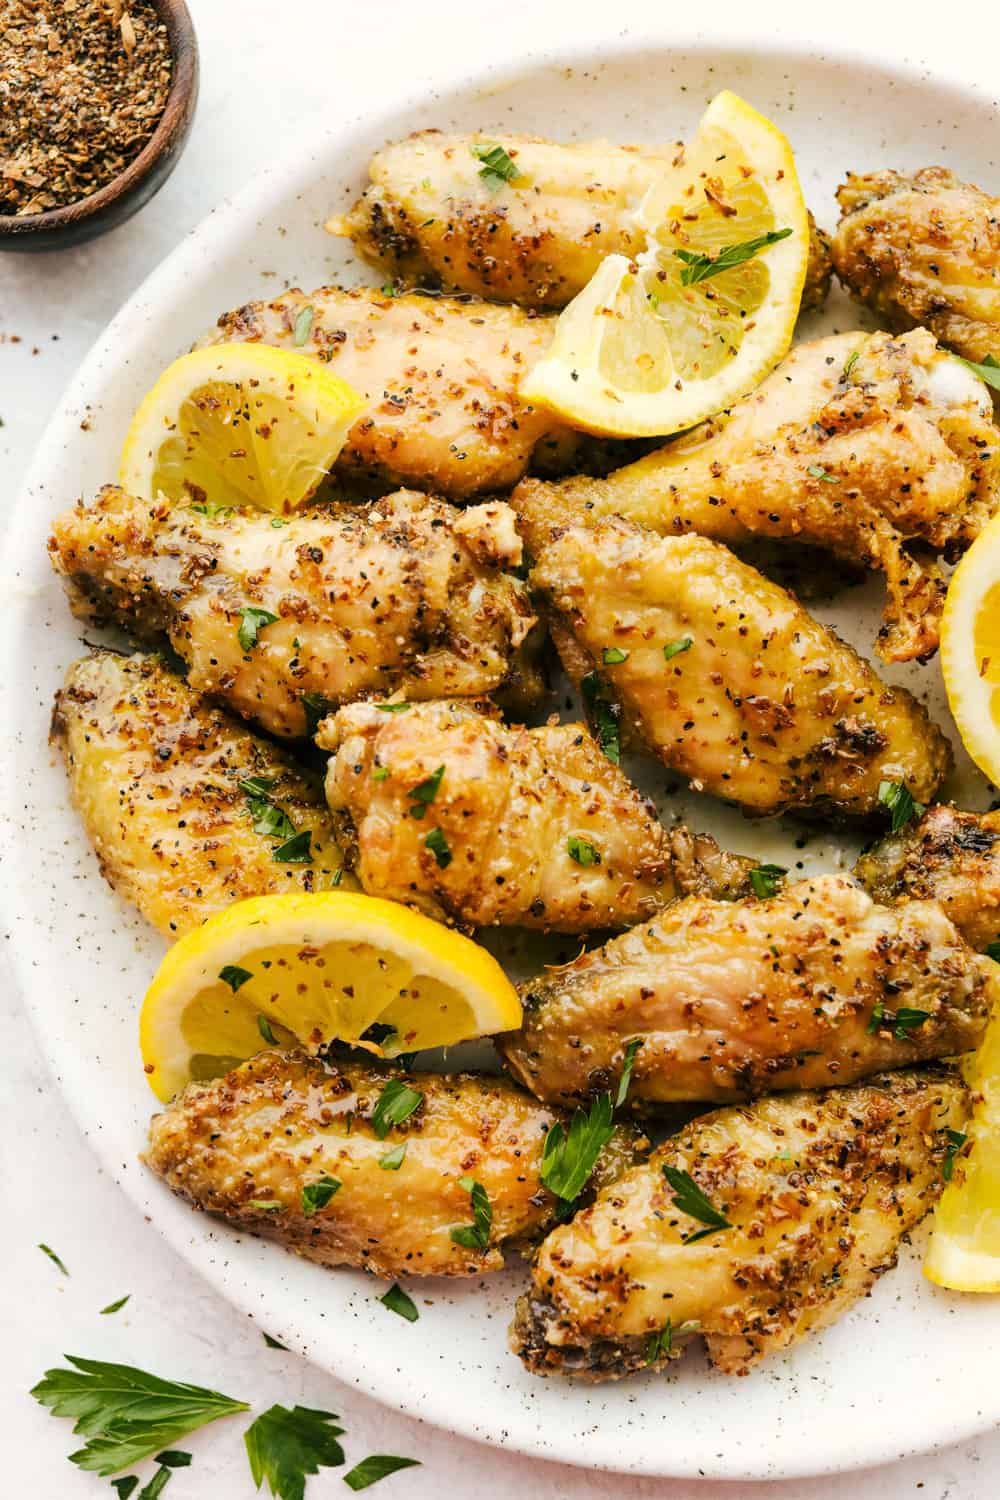
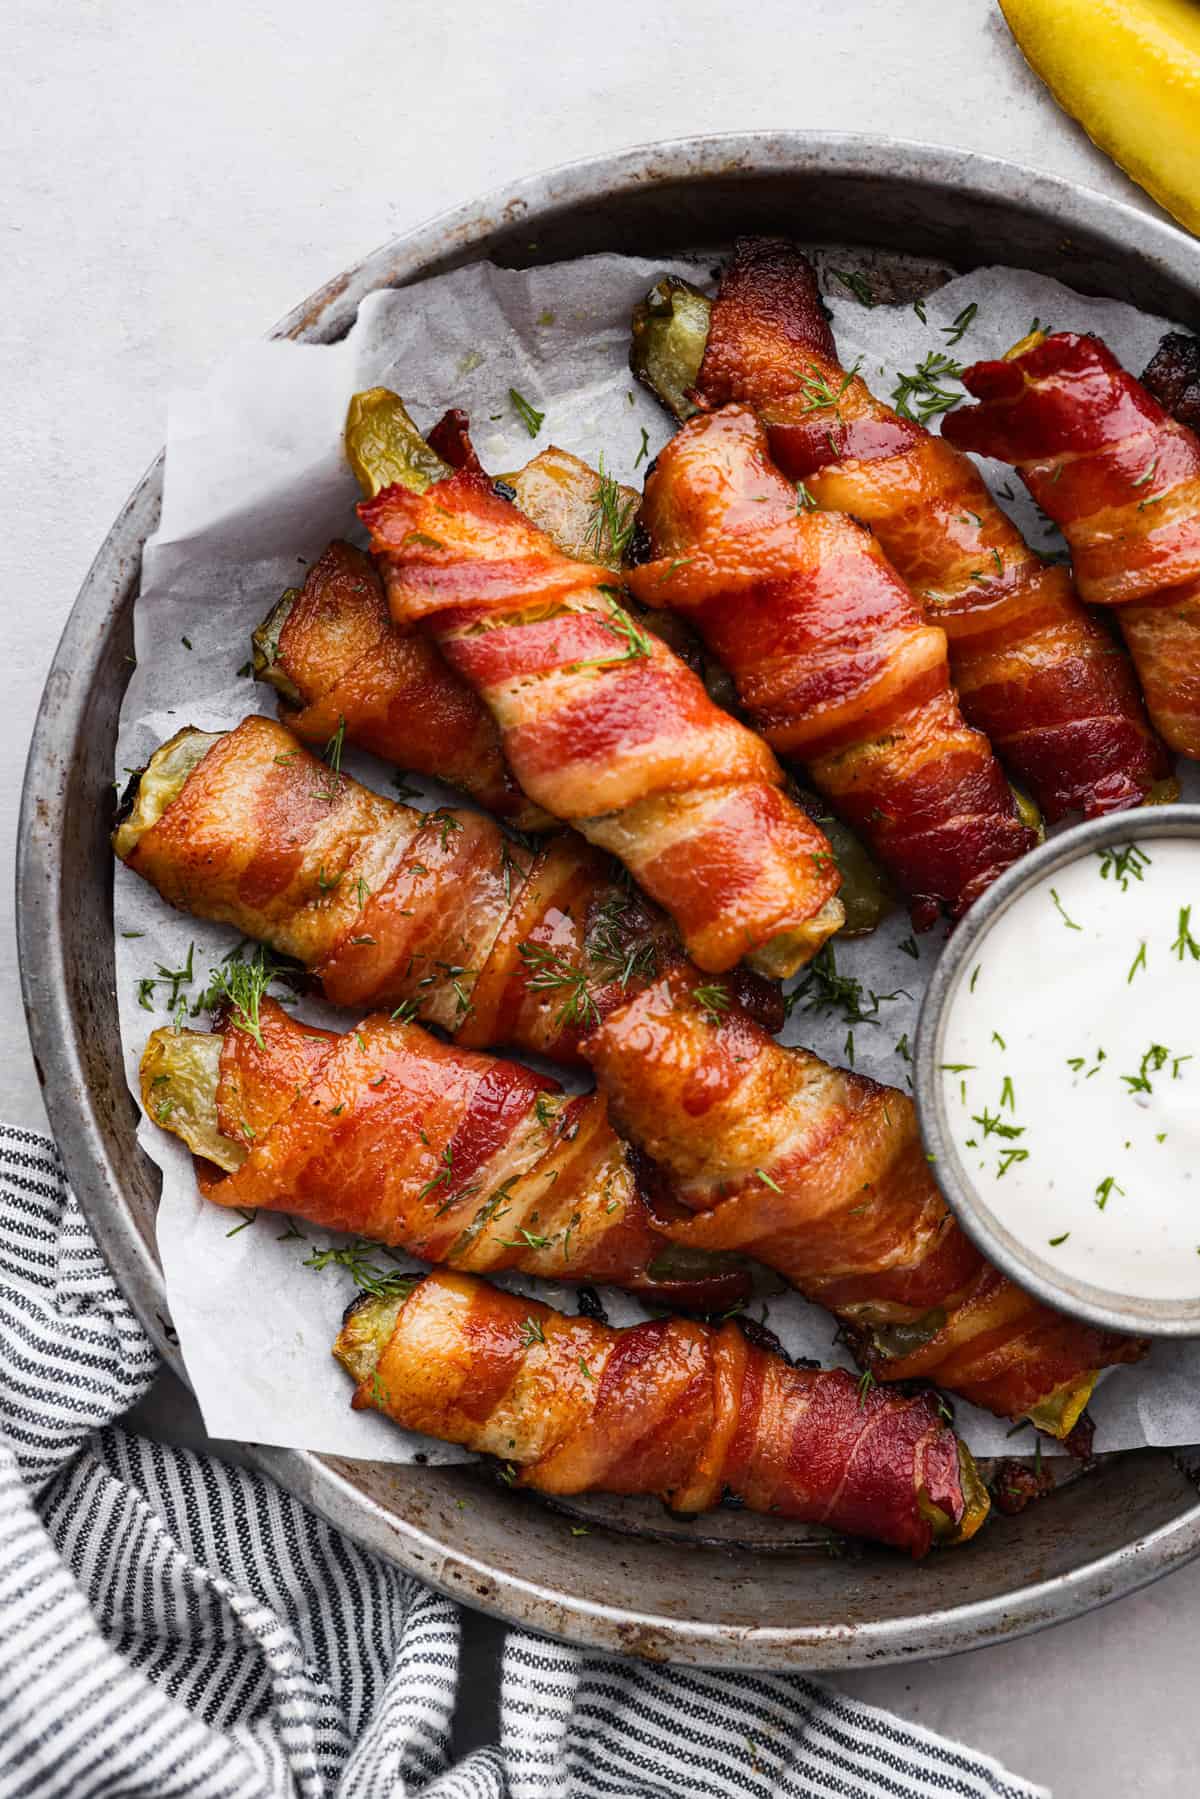
Meet your new wing obsession: Crack Wings. Salty, tangy, peppery, with a touch of sweetness. I’ve never seen a wing with a powder dusting so full of flavor! They are addictive because of the salty and sweet combo with that hint of heat.
What Makes These Wings Next-Level
Addictively Good: They’re called crack because of the addictive nature of the flavor combo; you’ll keep reaching for “just one more.”
Crispy Perfection: Crunchy on the outside, juicy on the inside, the way wings are meant to be.
Game Day Hero! Whether it’s game day, a party, or just dinner, everyone will be hooked.
Ingredients for Crack Wings
Chicken Wings: I recommend buying wings that are already separated into flats and drumettes.
Crack Seasoning: You can buy chicken crack seasoning on Amazon instead of making it yourself!
How to Make Crack Wings
Frying might sound tricky, but it’s actually simple, and these wings are totally worth the little extra effort. I’ve also included baking and air-frying instructions if you don’t want to fry them.
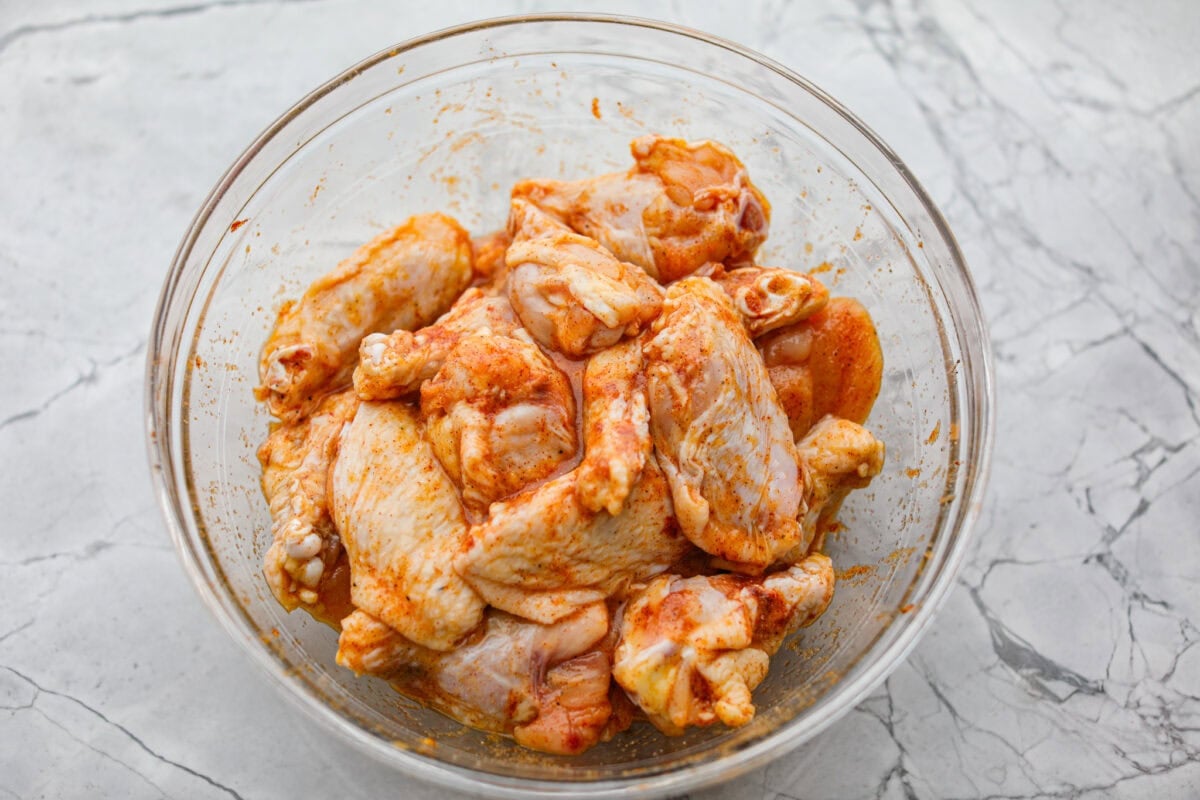
Season & Marinate: Pat wings very dry, then add them to a large bowl with lemon pepper, garlic powder, onion powder, salt, smoked paprika, black pepper, and beaten eggs. Toss to coat, then cover, and marinate 1–24 hours.
Heat Oil and Mix Breading: Fill a deep fryer or heavy pot with vegetable or canola oil and heat to 325–375ºF. In a medium bowl, combine flour, cornstarch, lemon pepper, garlic powder, onion powder, and ranch seasoning.
Bread Chicken: Remove wings from marinade, then dredge them in the flour mixture, and coat well.
Fry: Fry wings in batches for about 12 minutes, until golden and 165ºF inside. Transfer to a paper towel–lined sheet.
Make Crack Seasoning: In a bullet blender, blend powdered sugar, lemon pepper, and ranch seasoning until fine and white.
Sprinkle and Serve: Then, sprinkle the powder generously over hot crack wings and serve immediately with hot sauce.
Oven & Air Fryer Instructions
Oven-Baked Crack Wings
Prep: Omit the eggs, add 1 tsp baking powder to the initial seasoning in step 1, then toss the wings to coat. Completely skip the breading.
Arrange: Place wings on a foil-lined, nonstick-sprayed baking sheet.
Bake: 400°F for ~45 minutes, flipping every 10–15 minutes, until golden and 165°F inside.
Finish: Top with crack seasoning and enjoy!
Air Fryer Crack Wings
Prep: Same as oven. Omit the eggs, add 1 tsp baking powder, and skip the breading.
Arrange: Spread wings in a single layer in the air fryer basket.
Cook: 400°F for 10 minutes, flip, then 8–10 more minutes until golden and 165°F inside.
Finish: Sprinkle with crack seasoning and serve hot.
Pat 3-4 pounds party chicken wings very dry with paper towels, then add them to a large bowl.
Add 1 tablespoon lemon pepper, 2 teaspoons garlic powder, 2 teaspoons onion powder, 1 ½ teaspoons salt, 1 teaspoon smoked paprika, ½ teaspoon ground black pepper, and 2 large beaten eggs to the wings and toss until all the wings are evenly coated. Cover and marinate in the refrigerator for at least 1 hour, or up to 24 hours.
After the chicken has marinated, add 1 ½-2 quarts vegetable or canola oil to a deep fryer or large, deep, heavy-bottomed dutch oven and heat over medium-high heat until it is between 325 and 375 degrees Fahrenehit.
Meanwhile, add 1 cup all-purpose flour, ½ cup cornstarch, 2 teaspoons lemon pepper, 1 teaspoon garlic powder, 1 teaspoon onion powder,and 1 teaspoon ranch seasoning to a medium bowl. Mix to combine.
Once the chicken is done marinating and the oil is up to the correct temperature, remove the chicken from the bowl and add it to the flour mixture, coating each one fully in the breading.
Carefully add the chicken wings in batches to the oil and cook for 12 minutes or so, until the breading is golden and the chicken reaches the internal temperature of 165 degrees Fahrenheit. Transfer the cooked chicken to a paper towel-lined baking sheet and sprinkle with salt and pepper to taste.
While the chicken fries, make the chicken crack seasoning by adding ⅔ cup powdered sugar, 3 tablespoons lemon pepper seasoning, and 3 tablespoons ranch seasoning to a blender (a bullet blender works best) and blend for 5-10 seconds, until it forms a white powdered seasoning.
Sprinkle the chicken crack seasoning liberally over the fried wings and serve immediately with hot sauce on the side.
Notes
Storage, Reheating, & Make Ahead Instructions
Storage: Keep leftover wings in an airtight container in the fridge for up to 5 days.
Reheat: Bake at 375ºF for 10–15 minutes, or air fry at 375ºF for 6–8 minutes, flipping halfway, until crispy again.
Make Ahead: Season wings up to 24 hours in advance. Cover tightly and refrigerate until ready to cook, then proceed with step 2.
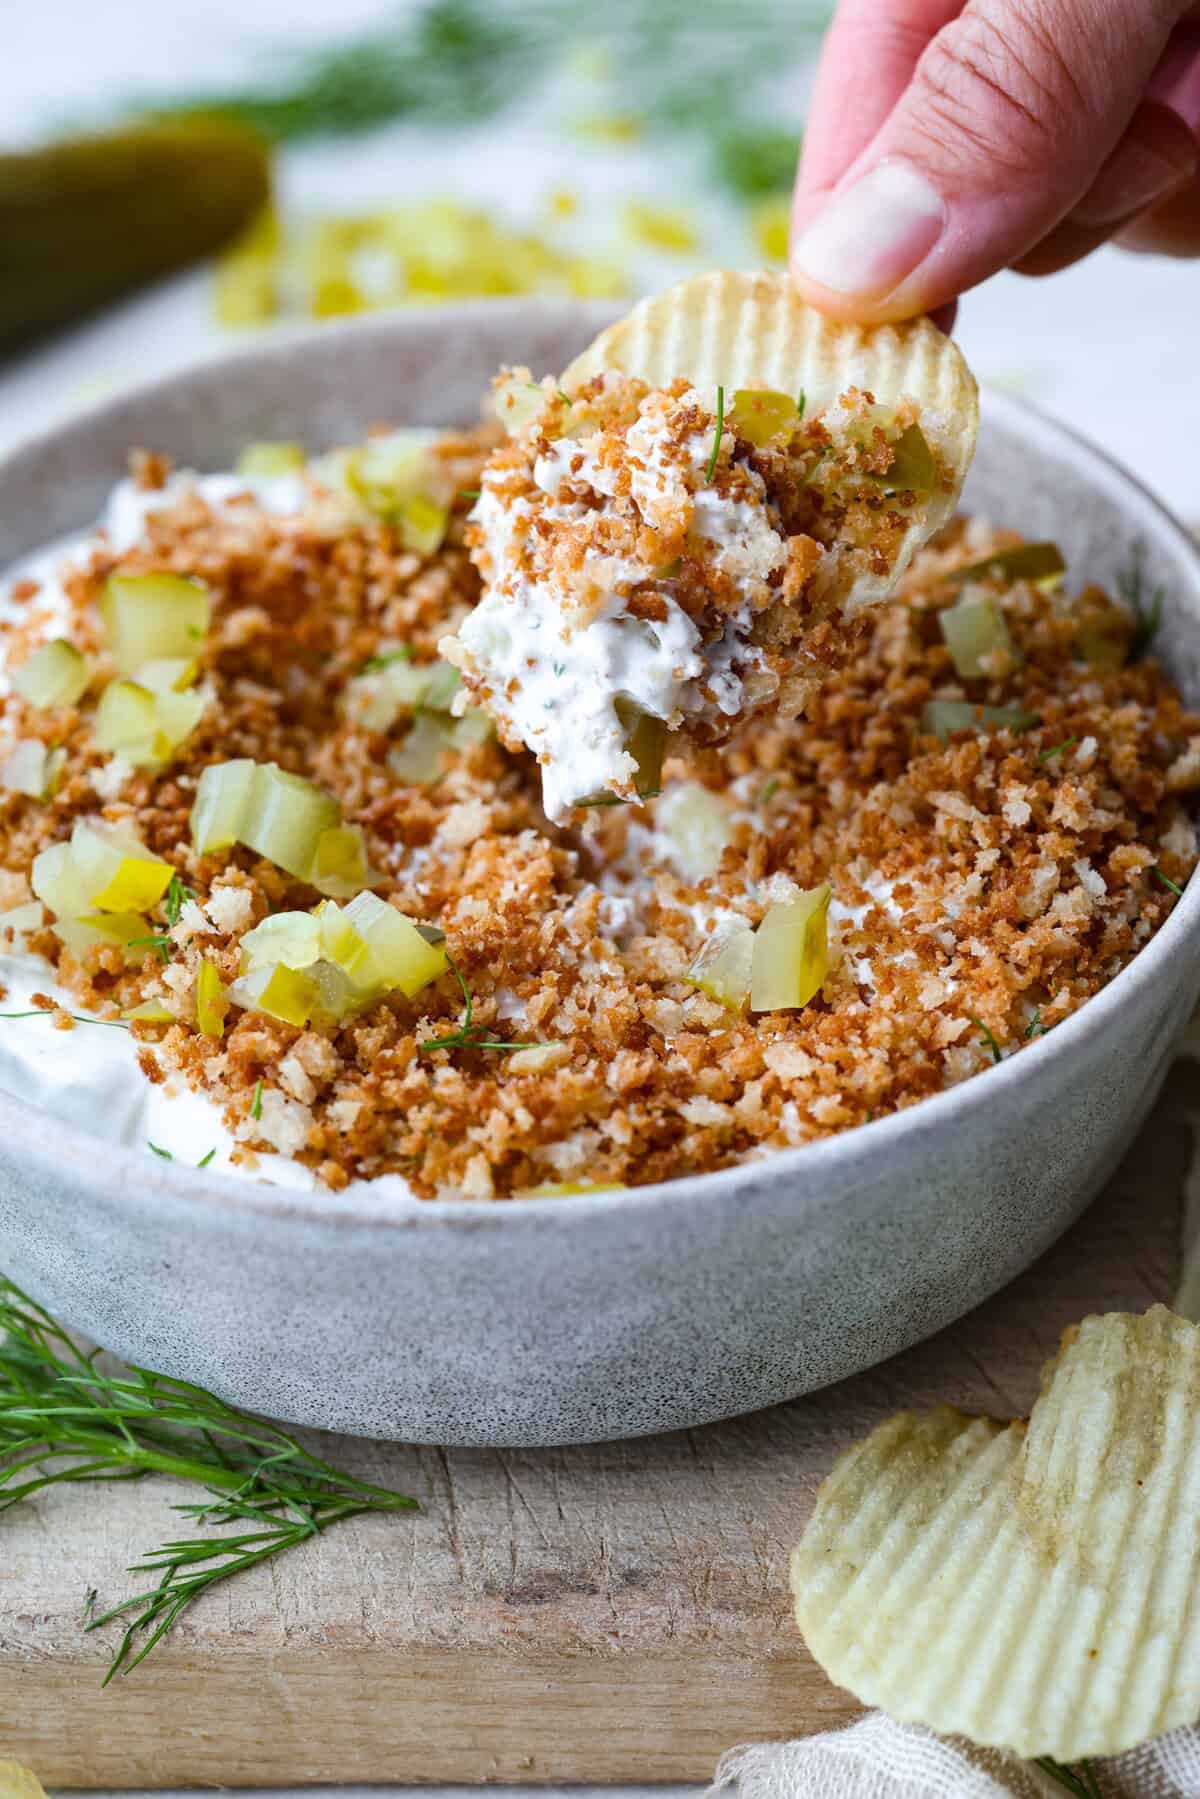
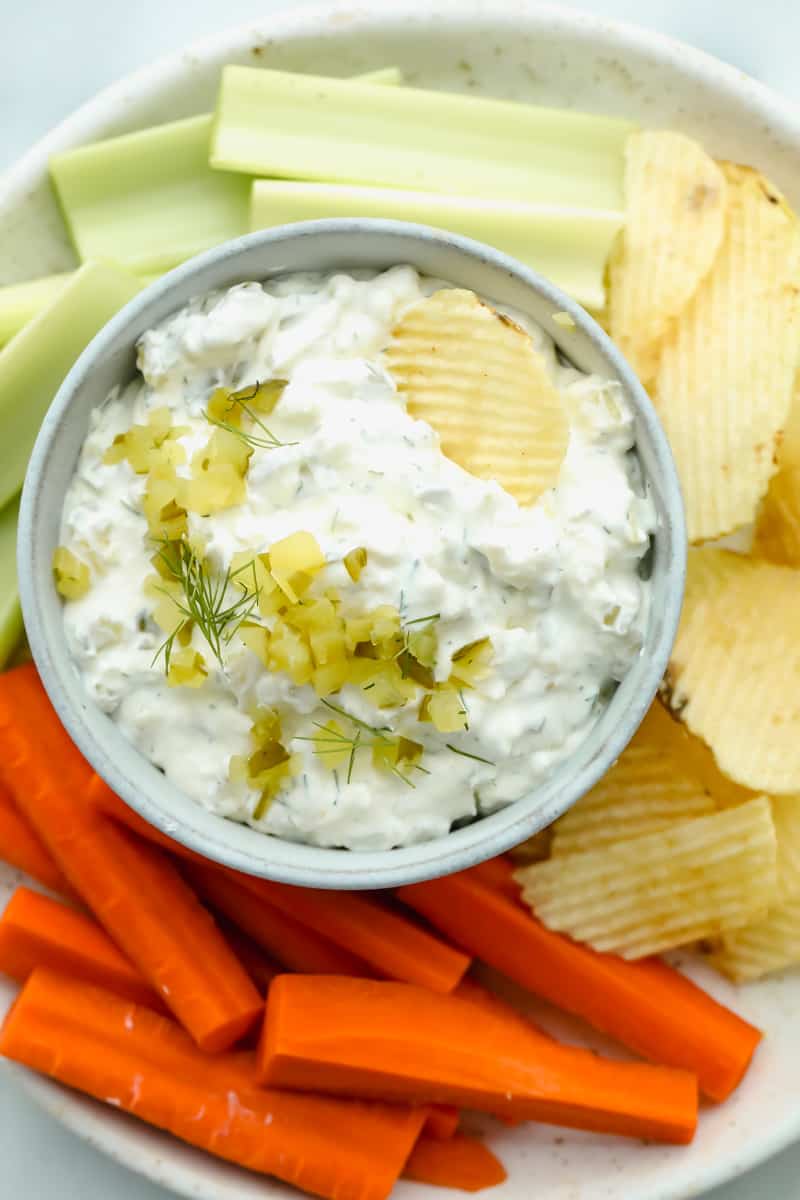
Meet my Fried Pickle Dip…a viral take on my popular pickle dip! The toasted bread crumbs elevate the flavors with the crunchy “fried” texture.
The Insider Scoop on This Fried Pickle Dip
Crunch in Every Bite: My secret is to layer the toasted bread crumbs inside so every scoop has that fried pickle crunch.
All the Pickle Love: I tested this until the creaminess and tang hit just right. It’s packed with dill pickle flavor (because you know I’m obsessed)!
Make-Ahead Friendly: This dip never lasts long at my house. You can prep it ahead, and it still tastes like heaven when served.
Fried Pickle Dip Ingredients
Dill Pickles: Use your favorite brand of dill pickle! Dab the chopped pickles with a paper towel to absorb any extra moisture. This prevents your dip from being runny.
Cream Cheese: Be sure to use softened cream cheese so your dip mixes well.
Panko Bread Crumbs: No substitutions here…Panko is a must! It’s the key to getting that perfect crunchy “fried” texture.
How to Make Fried Pickle Dip
You already know how obsessed I am with pickles. So when I heard about fried pickle dip, I had to try it. And let me tell you, it’s everything I hoped for and more! Creamy, crunchy, tangy, and downright addictive. It’s the perfect snack!
Toast the Panko BreadCrumbs: In a medium-sized skillet over medium heat, add the butter and Panko bread crumbs. Once the butter melts, stir frequently to toast the bread crumbs for 2-3 minutes, until golden brown.
Combine: In a medium-sized bowl, combine the sour cream, softened cream cheese, ranch seasoning, chopped dill pickles, pickle juice, garlic powder, and fresh dill.
Mix: Using an electric hand mixer, mix until well-combined.
Garnish and Serve: Serve immediately or chill for 1 hour to let the flavors blend and to thicken the dip. Before serving, top the dip with the toasted Panko bread crumbs and garnish with more fresh dill, if desired. Serve fried pickle dip with pretzels or potato chips!
Alyssa’s Pro Tip
Want the “fried” crunch in EVERY bite? Layer toasted bread crumbs inside the pickle dip. Add half the dip, sprinkle crumbs, then repeat with the rest.
In a medium-sized skillet over medium heat, add 1 tablespoon unsalted butter and ½ cup Panko bread crumbs. Once the butter melts, stir frequently to toast the bread crumbs for 2-3 minutes, until golden brown.
In a medium-sized bowl, combine 1 ½ cups sour cream, 4 ounces softened cream cheese, 1 (1-ounce) packet Ranch seasoning, 1 ½ cups chopped dill pickles, 2 tablespoons dill pickle juice, 1 teaspoon garlic powder, and 1 tablespoon minced fresh dill.
Using an electric hand mixer, mix until well-combined.
Serve immediately or chill for 1 hour to let the flavors blend and to thicken the dip. Before serving, top the dip with the toasted Panko bread crumbs and garnish with more fresh dill, if desired. Serve with potato chips!
Notes
Storing Leftovers
Refrigerator: Store dill pickle dip in an airtight container for 3–4 days. Add bread crumbs to portions only, since they soften in the fridge.
Freezer: Not recommended. The cream cheese changes texture once thawed.
If you’re bringing a dish to the next family reunion, make it these loaded baked beans . Three kinds of meat, two kinds of beans, and a sauce that is smoky, sweet, and full of depth . They disappear every single time. Why These Check Every Box One Pot: Everything comes together in a single pot before going straight into the oven. Less mess, more eating! Make It Your Own: Want more heat? Add extra cayenne. Prefer a different sausage? Go for it. This recipe is easy to customize. Even Better the Next Day: The flavors deepen overnight, making leftovers something to look forward to, and it’s make-ahead friendly! Ingredients for Loaded Baked Beans Bacon: Regular or thick-cut bacon both work great. Use whichever you prefer or have on hand. Serving as an Entree: These beans are hearty enough to serve as a main dish! As an entree, plan on feeding about 7 to 8 people. For Saucier Beans: These baked beans are not as saucy as som...